Tips For Producing High Quality Transcripts
When you work as a professional transcriptionist, you often encounter various audio files, in many different formats and recorded by various means. You discover very early on that there are big differences among them. As a professional, you encounter everything, from high-quality files which were created in a recording studio, where you can hear everything that was said very clearly and without straining your ears. On the other end of the spectrum, there are audio files that have horrible sound quality, audio recordings so bad that you have the feeling that the recording device was placed not in the room where it should have been, but somewhere far away, on the other side of the street from the speakers. When this happens, the people that are doing the transcription will be facing a challenging task. This means more turnaround time and, in some cases, when parts of the tapes are inaudible, this means less accuracy. This is why we will give you some tips and advice on how you can easily improve the audio quality of your recordings.

Our first advice is connected to the equipment. You don’t have to invest tons of money into a whole recording studio to get decent recordings, but paying a little bit extra to purchase a quality recording device would make sense, especially if you need to transcribe audio files often. A smartphone might make good recordings, but not if we are recording a speech in a room full of people who are all mumbling something that only they can understand. Today, you have a waste choice of high-quality recording devices, so maybe it is time to check them out and chose the one that is best suitable for your needs.
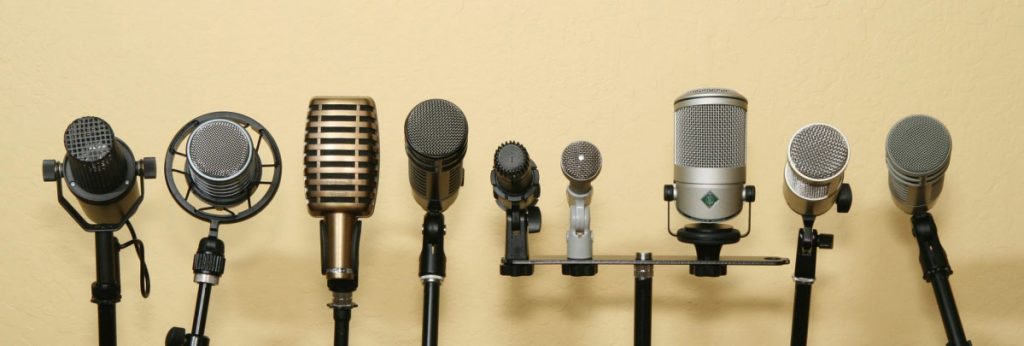
In any case, utilizing good equipment when recording audio is one of the crucial steps for ensuring the final outcome of the transcription, and the quality and precision of the written down text. Therefore, if you have the right combination of the microphone, recording software and if you use a good setup, your audio quality will improve from amateur to an almost pro, and in the end, you will get a much better transcript. When considering microphones, take note of the fact that various microphones are ideal for various audio environments, and some are more suited for specific kinds of recordings. For example, you might utilize different microphones if your aim is to record just one person speaking, or if you intend to record all the different speakers and sounds in the room. Take into consider that microphones are grouped into three main groups, which are dynamic, condenser, and ribbon. Each of these is specialized in providing a somewhat different type of sound recording. There are also subvariants of these three groups, some types of microphone can be easily mounted to a camera, some microphone are intended to hang from above, some smaller types can be worn on your clothing, and many more. There are so many options, and it is therefore crucial to ask yourself what kind of audio are you planning to record, how many speakers will be present, at what kind of location will the recording take place, what will be the situation in regards to the level of the expected background noise level, and finally, from what direction will the audio be coming from. If you know the answer to these questions, you can easily determine what would be the best option for your specific recording, and you can rest assured that the final result of the transcription of that recording will be a precise and accurate.

A technical aspect that is equally as important as the quality of the recording device is the setup of the studio or recording space. If you have at your disposal an option to record in a somewhat spacious room that has high ceilings and soundproof walls, and also floors made of concrete, this would be the ideal environment in which to record your content. However, if the circumstances are different, and you must improvise, there are plenty of ways in which you can improve the quality of the recording space. It is not so complicated; you just have to find some kind of space that is quit and that does not have too much echo. In order to further optimize the space for your recording purposes, you can take an extra step and hang some heavy blankets on the wall, or improvise a kind of makeshift booth around your recording device. This will greatly reduce external noise and prevent echo, which is what happens when the sound bounces from one wall to another.
Another key factor is the recording software that you utilize. It does not matter how great your setup, space and the microphone are, at the end you will probably need to make some small edits to your recording before you finalize it. There is a plethora of paid software that you can utilize, but there is no need to cash out a lot of money if you do not want to. There are many free recording programs that you can use, among them are such freeware classics such as Avid Pro Tools First, Garage Band and Audacity. These neat little programs are easy to use, do not require much technical background, and can be simply downloaded from the producer’s webpage directly to your computer and you can then tweak your recording, make little changes to the noise levels, cut out the parts that are not important, add various effects and filters, and export the final file in various formats.
When it comes to the factors of audio quality that are directly linked to the speakers themselves, it is important for the speakers to control their voice when they are being recorded. That means that the speaker shouldn’t talk too fast or too quiet. Mumbling also isn’t appreciated at all when you are recording an audio file. This will be helpful especially for speakers who tend to speak with a strong accent. Just slow it down a little bit and try to pronounce the words clearly and loud enough. You will make the entire transcription process run much more smoothly if you invest a little effort into controlling the tonal qualities of your speech utterances.
One more thing, which might not be self-evident, but a lot of people easily forget it, is that when you are giving a public speech you shouldn’t be chewing a gum or eating anything. Not only this is rude and shows you don’t have proper manners, but the audience will probably be annoyed by your behavior. Also, you risk that you won’t be able to pronounce your words clearly which can cause huge problems later on, in the transcription phase. Unpacking your lunch while taking part at a conference could also make horrible background noise, especially if this conference is being recorded. Just take that into consideration, and come to the recording fully prepared, be mindful of the little details, eat you lunch several hours earlier, so that you do not have to make lunch noises at the meeting, and stop chewing your gum before you start to speak, and the quality of your audio recording and the transcript of it will for sure be much better.
The placement of the recorder it also really important when recording someone speaking. Generally, it should be placed in the middle of the circle of people who are speaking. It often happens to transcriber that they can hear one person very clearly, but they have problem understanding the other person who is quieter. Also, transcribers equipment usually includes headphones so sometimes the change in volume of the speakers is very uncomfortable for us. This is why maybe you can also position the recorder closer to the person who speaks a bit quieter.
In meetings it often happens that we have one person speaking and then somewhere in the corner there are 2 colleagues chatting and cross talking. For transcriptionists this is a real nightmare since this interferes with the speaker and makes horrible background noise. This is why you should make sure to make the participants of the meeting or event which you want to record are aware of this, so that cross talking shouldn’t occur often or at all for that matter.
You could also try to do a test recording before the event or meeting starts. Just record and play it and see how good the sound quality is and if there is something that could be done to make it better. You can for example, change the placement of the device or ask certain individuals to speak louder. Little adjustments could be very important for the overall quality of the audio file. When your recording starts to sound good you can continue with your meeting.
Those are just some little things that you might do to upgrade your recordings. Make sure to try them out and you will see that the end result will be great.