Subtitles and VLC Media player
VLC Media Player is a multimedia player which is popular due to the fact that ifs free and open-source and not very complicated to use. Besides that, VLC is compatible with various platforms. It is very easy for users to add captions and subtitles to different kinds of videos, but how the user will do it, depends on your operating system, i.e. whether you use Windows, Mac, or Linux.
When it comes to adding captions and subtitles to videos, movies or your favourite series in VLC Media player, you have two possibilities. Which one you should choose, depends on what you want to do. One possibility is to open a sidecar captions file. By doing so, you can view the file alongside the video. This method is suitable if you want to upload subtitles in a different file and if your goal is to check the subtitles and captions at the beginning of your editing process. The other possibility is to embed closed captions and subtitles into the video. By doing so, you’ve added them permanently, so it suits more the finishing phase of your video editing. Let’s take a look at the possibilities more closely.
Sidecar captions file
There are two simple steps you need to take, if you want to open a sidecar captions file in VLC Media Player. Step number one: the video and its subtitles need to have the same name, even though they can have different extensions. Step number two: they need to be in the same folder. So, make sure that this is the case and you are good to go! You only need to open the video file, and the subtitles will automatically open as well. This works also if you have VLC Media Player for Android, iPhone and iOS.
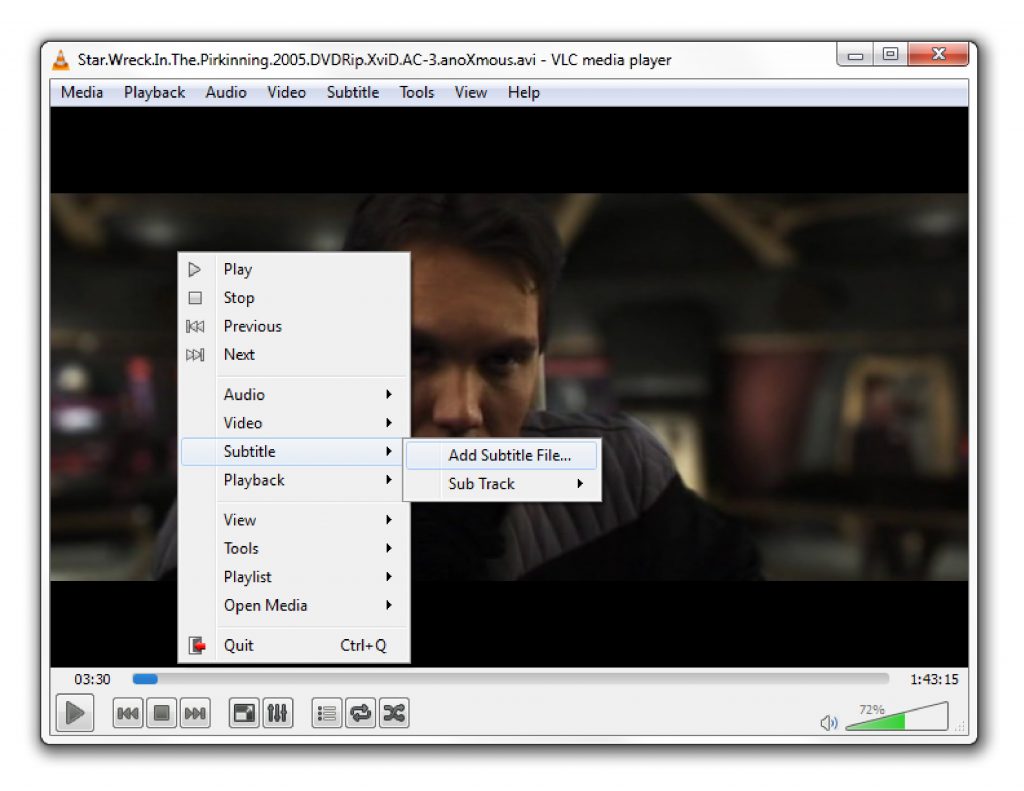
Another option is to manually add the subtitles. You just open the video in VLC Media Player. If you got a Mac, you have to select Add Subtitle File on the Subtitles tab and choose your file from the dialog box. If you want to switch to another language, you can select the desired language by going to Subtitles Track.

Caption formats and VLC Media Player
VLC Media player supports the following caption formats: DVD, MicroDVD (.sub), SubRIP (.srt), SubViewer (.sub), SSA1-5 (.ssa, .ass), JACOsub (.jss), MPsub (.sub), Teletext, SAMI (.SAMI), VPlayer (.txt), Closed captions, VobSub (.sub, .idx), Universal Subtitle Format (.usf), SVCD / CVD, DVB, OGM (.ogm), CMML, Kate, ID3 tags, APEv2, Vorbis comment (.ogg).
Embed captions into video
If your goal is to permanently add subtitles to a video file, you will need some sort of editor (Adobe Premiere Pro, Avid Media Composer or iMovie) from which you’ll have to export videos with embedded captions. The result will be automatically added subtitles not just in VLC Media Player, but in any other player as well.
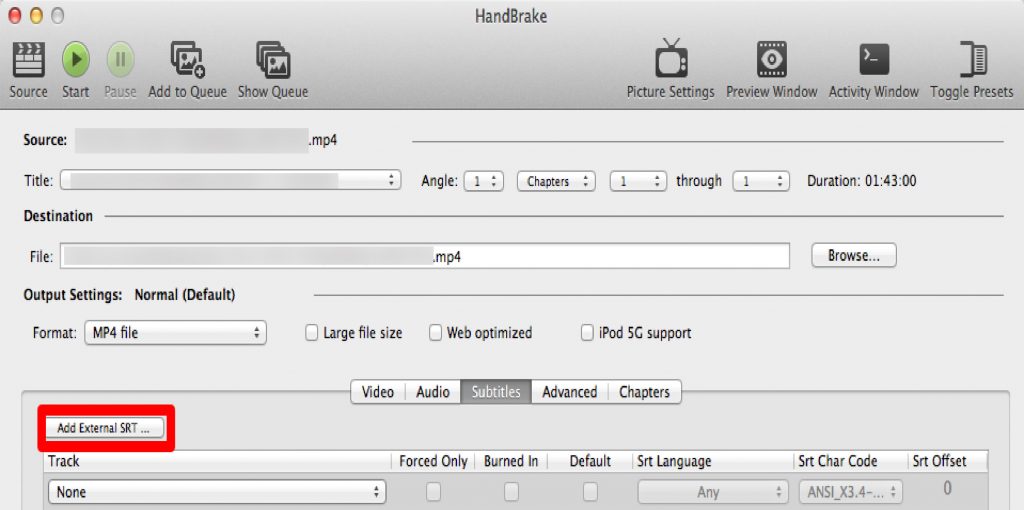
We would also like to mention a free video transcoder, Handbrake, which permits you to encode SRT files and to add multiple languages. First thing you will need to do is to download your captions file in the SRT format, open the video in Handbrake and then go to Subtitles tab. After you expand the Tracks drop-down menu, klick on Add External SRT. As we already said, you can add more than one subtitle file.

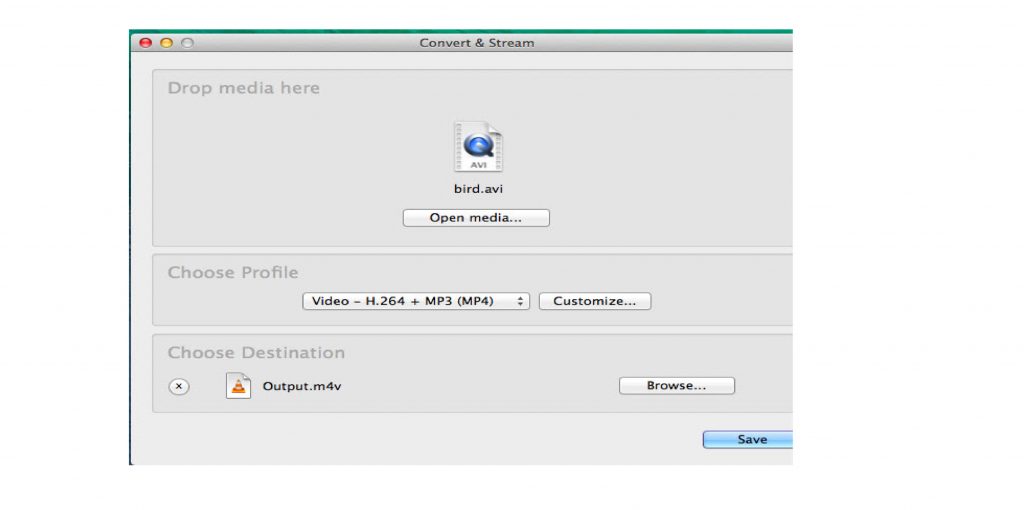
You can also encode your subtitle file to your video in VLC Media Player. But keep in mind that VLC is not an editing tool, so the encoding will be limited. On Mac, just go to File tab, select Convert and Stream. The next step is to add the subtitle in Open Media. Also, you can select your desired profile.

For more subtitle options select Customize. In the new dialog box two subtitle file formats are offered: DVB Subtitle or T.140. Choose DVB Subtitle and check Overlay subtitles on the video. Further steps are: Apply, Save File and Browse. Pick the folder in which you want to save your file.
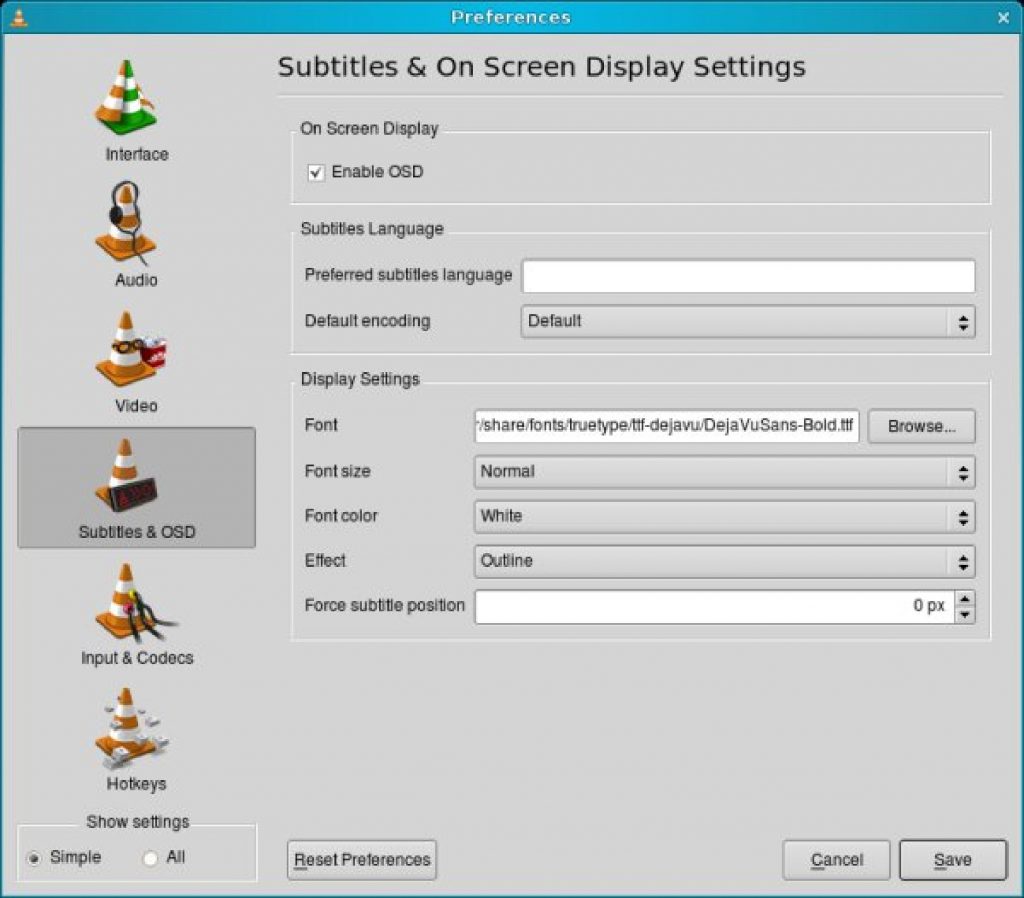
There is just one more important thing you will need. To turn on your subtitles in VLC Media Player so they get displayed (on Mac) you have to go to VLC, Preferences, Subtitles/OSD and check Enable OSD.

Now you know how to add your subtitles and closed captions files. We hope you’ll enjoy your movie!